Stacey2
Running on OSX
It is much easier (and quicker) to edit files on your local system than on a server using an ftp program, so it is worth investing the time to getting a local copy up and running.
Luckily, Mac OSX 10.5 & higher comes with both PHP & Apache pre-installed.
To get things running there are a few setup steps to go through:
- Download stacey and unzip the contents of the zip file to your desktop.
-
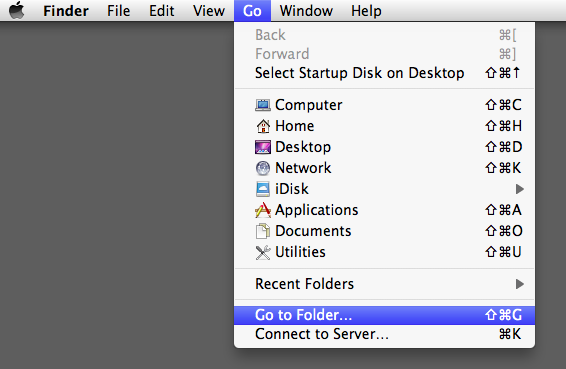
With a Finder window selected, click Go→Go to Folder...
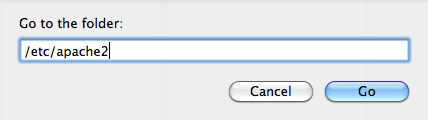
In the dialogue box that is provided, enter /etc/apache2/ and press enter.
-
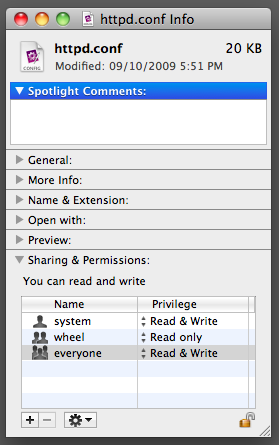
You will need to change the permissions of the apache2 folder and the httpd.conf file inside it to be: everyone: Read & Write. You can bring up the permissions on a file or folder by selecting it and pressing Command-I.
You may need to click on the small lock icon in the bottom right hand corner and enter your password before osx will allow you to change these permissions.
-
Next we need to enable PHP, so open up httpd.conf in a text editor and find the line that reads:
#LoadModule php5_module libexec/apache2/libphp5.so
and remove the # so it reads:
LoadModule php5_module libexec/apache2/libphp5.so
Then we need to enable .htaccess support for the /Library/WebServer/Documents folder, so find the section that reads:
  <Directory "/Library/WebServer/Documents">
      #
      # Possible values for the Options directive are "None", "All",
      # or any combination of:
      #   Indexes Includes FollowSymLinks SymLinksifOwnerMatch ExecCGI MultiViews
      #
      # Note that "MultiViews" must be named *explicitly* --- "Options All"
      # doesn't give it to you.
      #
      # The Options directive is both complicated and important.  Please see
      # http://httpd.apache.org/docs/2.2/mod/core.html#options
      # for more information.
      #
      Options Indexes FollowSymLinks MultiViews

      #
      # AllowOverride controls what directives may be placed in .htaccess files.
      # It can be "All", "None", or any combination of the keywords:
      #   Options FileInfo AuthConfig Limit
      #
      AllowOverride None

      #
      # Controls who can get stuff from this server.
      #
      Order allow,deny
      Allow from all
  </Directory>
And change the ‘AllowOverride’ section to read:
  <Directory "/Library/WebServer/Documents">
      #
      # Possible values for the Options directive are "None", "All",
      # or any combination of:
      #   Indexes Includes FollowSymLinks SymLinksifOwnerMatch ExecCGI MultiViews
      #
      # Note that "MultiViews" must be named *explicitly* --- "Options All"
      # doesn't give it to you.
      #
      # The Options directive is both complicated and important.  Please see
      # http://httpd.apache.org/docs/2.2/mod/core.html#options
      # for more information.
      #
      Options Indexes FollowSymLinks MultiViews

      #
      # AllowOverride controls what directives may be placed in .htaccess files.
      # It can be "All", "None", or any combination of the keywords:
      #   Options FileInfo AuthConfig Limit
      #
      AllowOverride All

      #
      # Controls who can get stuff from this server.
      #
      Order allow,deny
      Allow from all
  </Directory>
Then you can save and close the file.
-
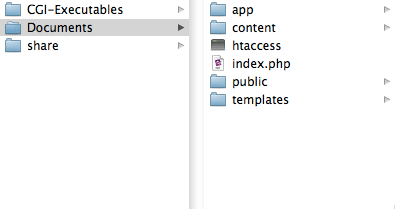
Next you need to open /Library/WebServer/Documents using the Finder, as this is where all of our website files will be stored.
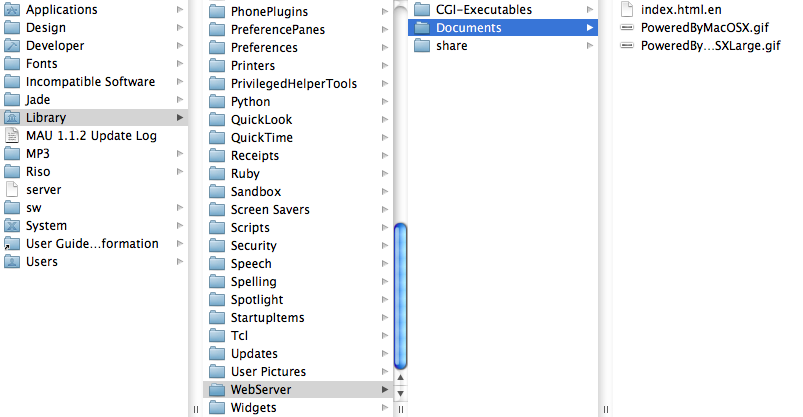
You should delete anything that is already in there and drag in the contents of the stacey folder that you unzipped to your desktop earlier.
Your Documents folder should now look like this:
-
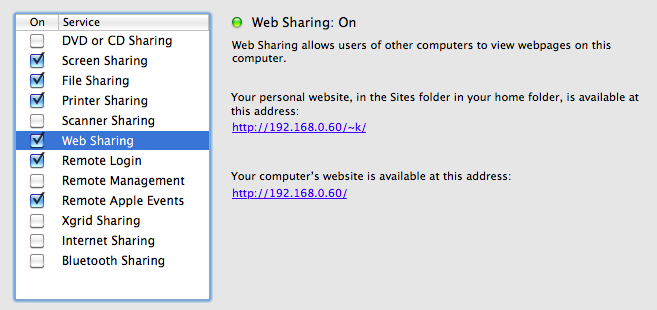
Next, open Sharing within your System Preferences and check the checkbox next to Web Sharing.
If this checkbox is already checked, you will need to uncheck it and then recheck it again (this restarts Apache, so that it will recognise the changes to the httpd.conf file).
-
You can’t rename your htaccess file to .htaccess using the Finder, so you will need to open up Terminal and type the following two commands:
  cd /Library/WebServer/Documents
  mv htaccess .htaccess
Terminal sits within you /Applications/Utilities folder.
-
Now if you open up a browser and visit http://localhost/, you should see your local copy of stacey running.
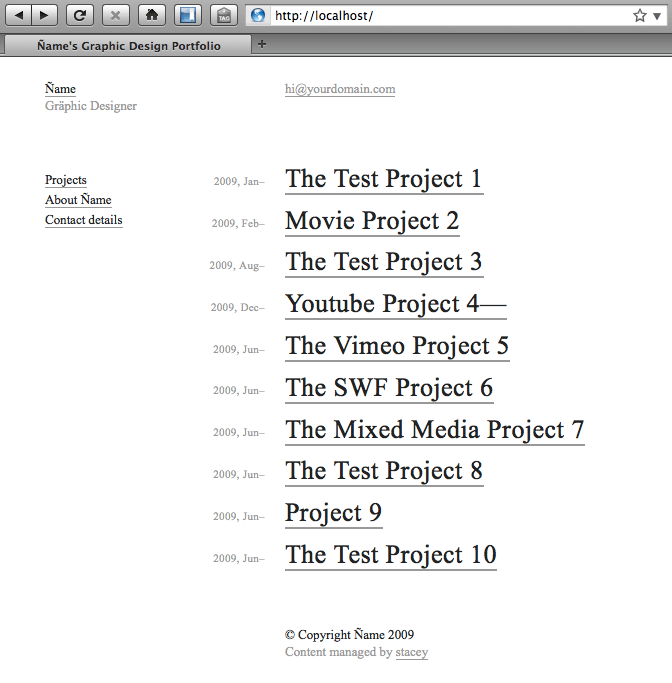
You can edit the files in the /Library/WebServer/Documents folder directly and then view the output at http://localhost/.
You have already completed the installation step, so you can jump straight into the content editing tutorial to read more about how stacey works.